.JPG)
So happy and excited to share with you another cute and yummy bread recipe - this time super kawaii and super fluffy Sheep Bread Buns!
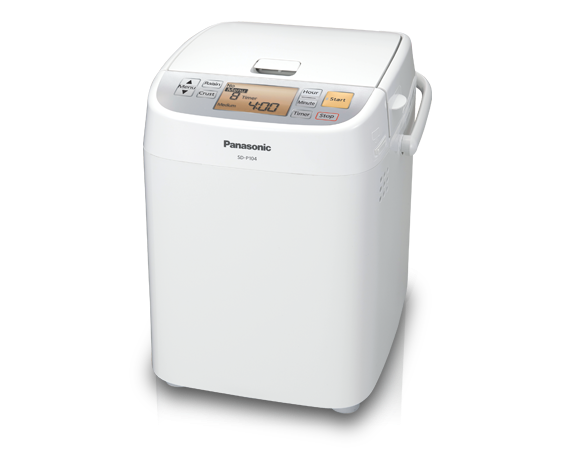
Most of my earlier bread recipes uses the hand-knead method, but now that I have received a trial set of the Panasonic Breadmaker as part of the Singapore Blog Awards, I wanted to try out using this bread maker machine to prepare the bread dough.
Several of my readers have asked me about using a breadmaker machine, so I hope you will enjoy this recipe post!
This kawaii character bread recipe is perfect for parent and child bonding session! Try it out this weekend!

To be honest, I was not inclined to use bread maker earlier as most machines lacked the function to be able to prepare the bread dough only option, which means that I could not stop the machine to take the dough out - to add stuff or to reshape it for oven baking.
Now that I have tried this Panasonic Bread Maker and its bread dough menu function, my views have started to change. Especially with the positive result of the bread dough - will talk more about this, keep reading.
Here are some photo snapshots showing the full outer body of the bread machine, the special ingredients dispenser and yeast dispenser (more about that below), and the accessories that included the measuring jar for liquids and a measuring spoon (tablespoon and teaspoon measurements). Oooooh and the spoon is pink in color - so pretty :P lol


13 menu options, that allows one to choose from (1) Bread (2) Rapid Bread
(3) Soft Bread (4) French Bread (5) Whole Wheat Bread (6) Rice Bread
(7) Rice Flour (8) Pineapple Bread (9) Bread Dough (10) Pizza Dough
(11) Dumpling Skin Dough (12) Cake (13) Chocolate.
Woo hoo! This is amazing, now I have so much recipe ideas spinning in my head that I want to try out with this bread maker, not enough time, too much cooking ideas!!

I personally enjoy the fun process of shaping the bread dough and would highly recommend this for a parent and child bonding session. Both children and adults alike will enjoy such recipes!
I used to teach children, and always recall how they love the experiential learning, and such a cooking session will be perfect. Plus they can get to be creative, they can pretty much shape the bread buns into any other designs they fancy.
Now are you ready to learn how to make this super kawaii bread? Please take a look at the recipe and step by step photos below!
The one thing I noticed about using the Panasonic Bread Maker to prepare the bread dough as opposed to using hand-knead method was that the bread dough was so soft, the baked bread buns were more fluffy. The bread buns also remained soft on Day 2.
This was a big bonus for a soft bread and Japanese bread lover like me.


Kawaii Fluffy Sheep Bread Bun Recipe
(makes about 8-10 bread buns) *depending on how large you want each serving to be.
This bread recipe was adapted from Cookpad recipe 1745586.
Ingredients for bread
bread flour 202g
cake flour 23g
salt 1.5g
sugar 22.5g
unsalted butter 15g
milk 165ml
dry yeast 4.5g
Ingredients for custard filling
milk 150ml
egg yolk 3
flour 50g
sugar 50g
Ingredients for decoration
powder sugar 1-2tsp
chocolate pen
*alternatively, you can also use melted chocolate/nutella etc
Method
Making bread dough
(1) Install blade in the bread pan.
(2) Add in sieved flour, salt, sugar, and unsalted butter. The pour the milk around the sides.
(3) Put the bread pan into the main body of the bread maker machine. Close the first lid.
(4) Pour the dry yeast into the yeast dispenser. Close the top lid.
(5) Select Menu '9'. Press 'Start'. It will take about 1 hour.
(During the wait, prepare your custard filling and you can also do your washing up)
(6) When you hear the beep sounds, press 'Stop'
(7) Remove the bread pan from the bread maker machine and take out the bread dough. Transfer the bread dough to your worktop.

(9) Roll out the round ball, divide into about 1:2 ratio. To the larger part, pipe on your custard filling, fold the dough and seal the sides by press the bread dough together. Make about 4 slits along the curve side.
(10) To the remaining smaller part, divide into 3:1:1:1. The largest part will form a oval shape bread ball for the sheep's head.
(11) The remaining will form the sheep's horn and the legs.
(12) Gently use a scraper to transfer the bread onto your baking tray lined with baking paper or silicon baking mat. Cover with damp lint-free cloth.
(13) Repeat for the remaining bread balls.
Ensure breathing space around the bread buns as they will increase in size after fermentation and also when baked. I ended up baking 4 sheep bread buns per tray.
(14) After all the character bread is formed, cover and allow the bread buns to ferment and rise for about 45-60mins until they almost double their original size.
(14) Dust the body of the sheep with some bread flour using a small sieve.
(15) Bake the bread buns at 170C for about 13-15mins. You can place them on the lower rack in the oven to prevent over browning of the bread buns.

(17) Draw the features of the sheep to complete the sheep bread buns using chocolate pen, or melted chocolate or nutella) Your kawaii sheep bread buns is done!

Making the custard filling
(1) In a bowl, add in egg yolks, flour and sugar, mix well.
(2) Heat the milk in a saucepan until it boils. Turn off the heat. Quickly pour in the mixture from step 1 into the milk, keep mixing until incorporated.
(3) Turn on your stove and cook the mixture at medium low heat. Keep stirring to prevent burning. The mixture will thicken and form a curd like texture. Remove saucepan from heat.
(4) optional step - you can sieve the custard mixture if you wish for it to be finer and remove the clumps.
(5) Transfer to a bowl and set it in the fridge.
(6) Transfer the cooled custard into a piping bag/pastry bag fitted with a round plain tip.


Panasonic Singapore
Official WebsiteOfficial Facebook Page
Please support my blog! Click on the link and vote for me (Little Miss Bento) at Panasonic's FB page. Thank you so much!ブログのランキングに参加中。よろしければクリックしてくださいね♪ ありがとうございます。
↓ ↓ ↓ ↓ ↓ ↓ ↓ ↓ ↓
Follow my food art and bento creations on my Facebook my page here or my Instagram here. :)