
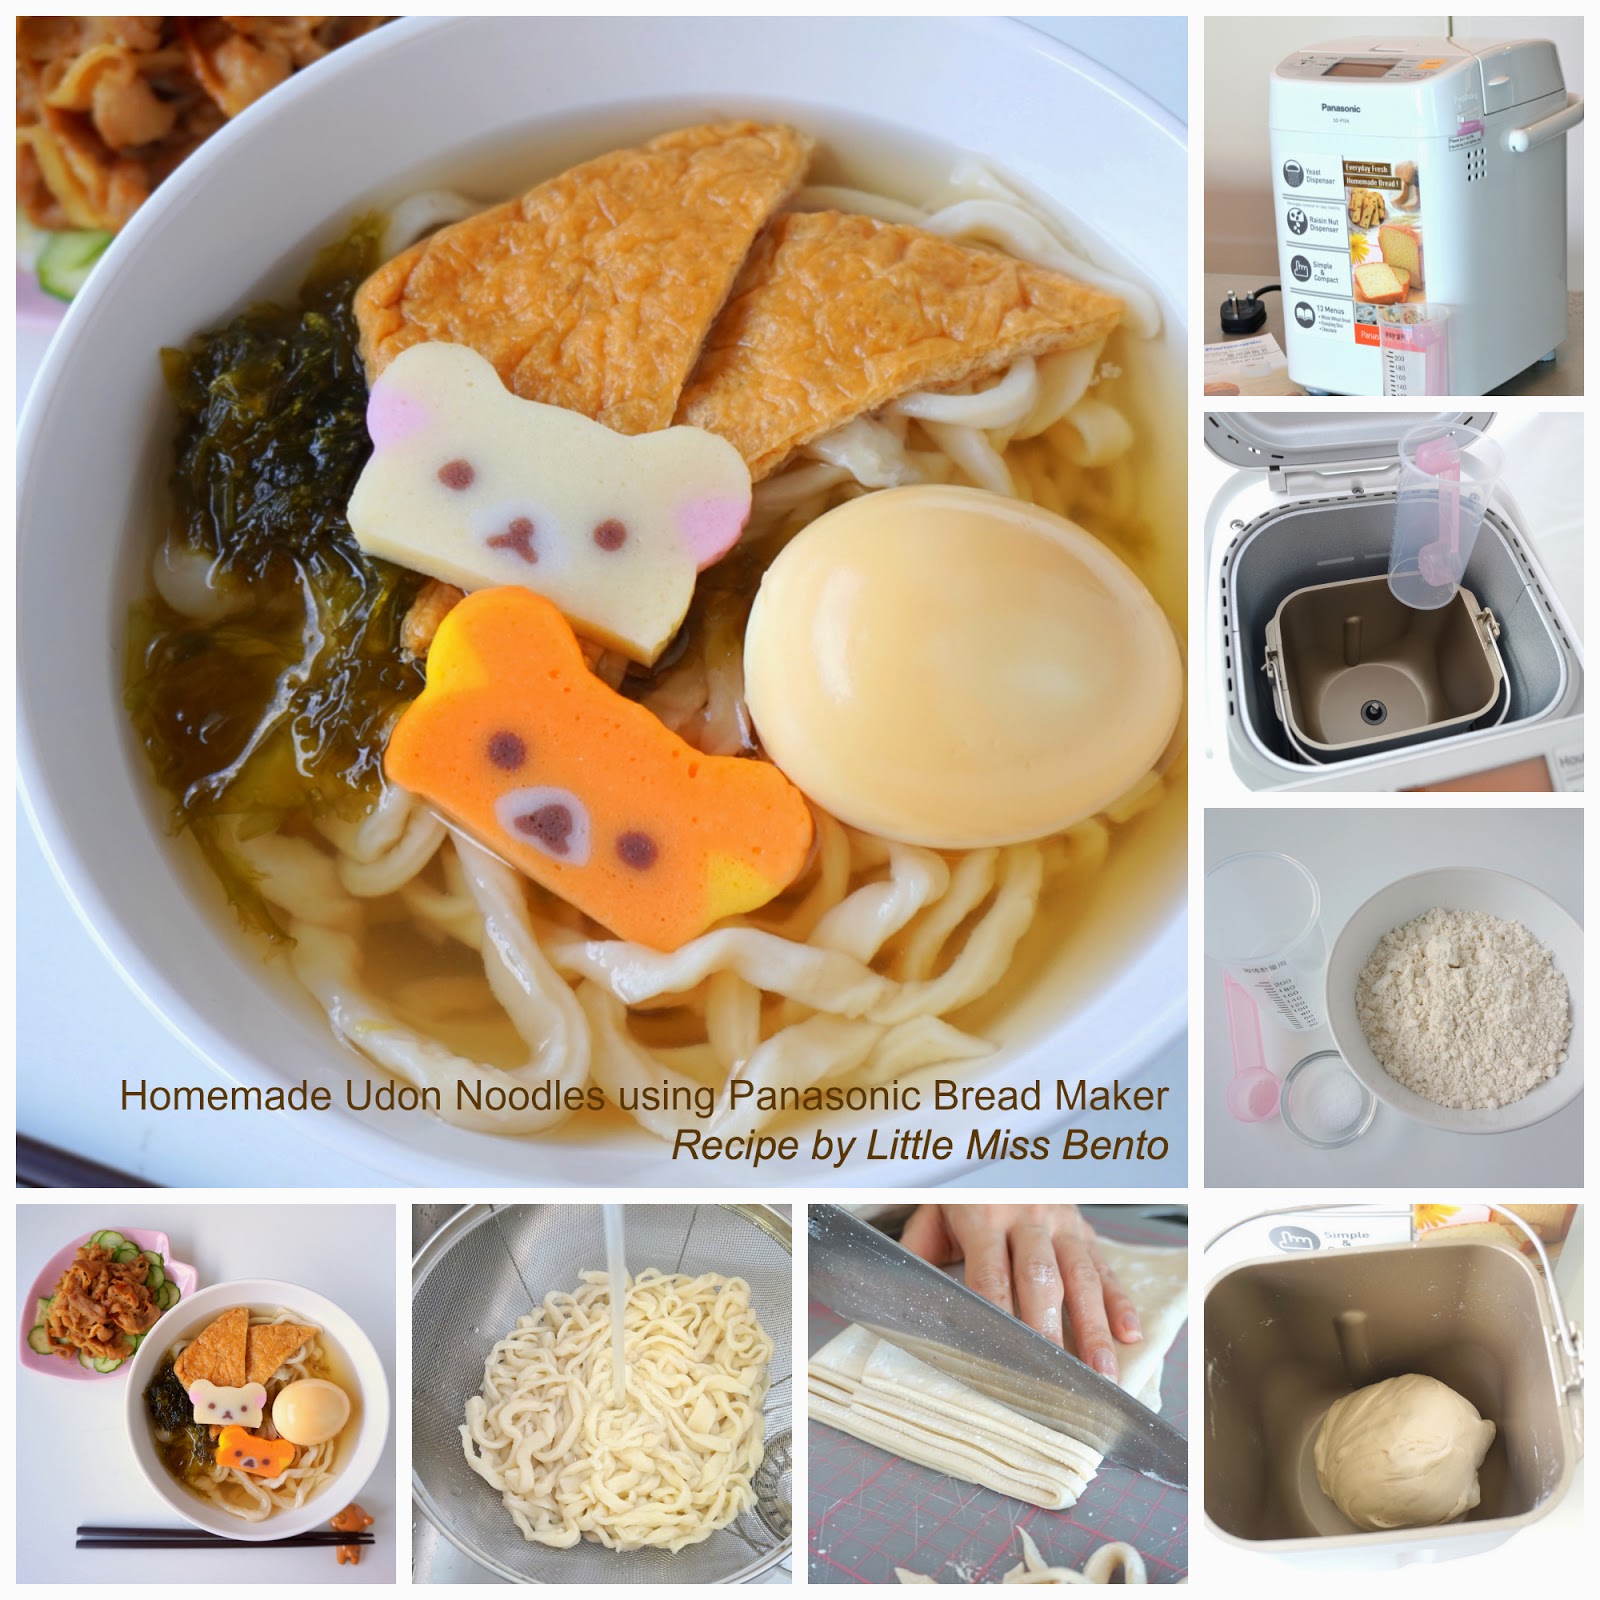
Weekend cooking!! Homemade Udon Noodles using Panasonic Bread Maker SD-P104. I also cooked a yummy light dashi soup to go with the noodles.
I love weekends and preparing homecook dishes for my family. Decided to use the trial set of the Panasonic Bread Maker machine thanks to the Singapore Blog Awards to make my udon noodles - The udon noodles dish was a success and I wanted to share the delicious and so easy recipes to make both the udon noodles and dashi soup with you :)
Taking time to cook together is one of the best activities for family bonding, ask your children and husband to help you along in this recipe - be it to prepare the ingredients, noodles, to cooking the soup etc. Get a pair of child friendly knife and your kids can even help to cut their own noodles. It is so wonderful for both adults and children to enjoy their own homemade udon noodles.

Here is the photo recap from my earlier post, showing the full outer body of the bread maker machine, the special ingredients dispenser and yeast dispenser, and the accessories that included the measuring jar for liquids and a measuring spoon (tablespoon and teaspoon measurements).


As promised, here is the delicious recipe for the homemade udon noodles and the dashi soup.
Japanese Udon Noodles Recipe using Bread Maker
Ingredients for udon noodles (serves 2 pax)wheat flour 200g
ice water 100ml
salt 6g
corn flour
favorite noodle toppings (e.g seaweed, aburaage tofu skin, kamaboko, egg)
Ingredients for dashi soup (serves 2 pax)
water 1litre
kombu seaweed 12g
bonito flakes (Katsuobushi) 20g
mirin 1.5tbsp
soy sauce 1tsp
sake 1.5tbsp
Method - Making Udon Noodles
(1) Add salt to the ice water and mix well.
(2) Install blade in the bread pan.
(3) In the bread pan, add in sieved wheat flour, and salted water.
(3) Put the bread pan into the main body of the bread maker machine. Close the cover.
(4) Select Menu '9'. Press 'Start'. It will take about 1 hour.
(During the wait, you can prepare your dashi soup)
(5) When you hear the beep sounds, press 'Stop'
(6) Remove the bread pan from the bread maker machine and take out the udon noodles dough. Check to ensure that the blade is not in the udon dough, remove if necessary.
(7) Shape the dough into a smooth round ball. Cover and keep in a ziplock bag and let it rest for 2 hours.

(9) Roll out the dough into a thin rectangular layer.
(10) Make 2 folds of the layer. Using a sharp knife, cut the dough into thin strips of noodles. Dust the cut noodles with corn flour and loosen them to prevent them from sticking together.
(11) Boil water in a large pot
(12) Cook the noodles for 6-8 mins (depending on how thick your noodles are).
(13) Drain the noodles and rinse under running tap immediately. This is to keep the noodles chewy and prevent overcooking.
(14) Serve with dashi soup and your favorite noodle toppings.
Tip: It is good to reboil the dashi soup and serve it with the noodles so that you can enjoy a hot bowl of noodles, since the noodles are cooled down after the rinsing process.
Note: Over here, I had aburaage tofu pockets, aosa seaweed, seasoned egg, kamaboko fish cake in cute bear characters as well as a side dish of buta-shougayaki (sauteed ginger pork slices).
Other possible noodle toppings could be wakame seaweed, soft boil egg, spring onions, mushrooms, tempura etc (anything you fancy!).

Method - Making Dashi Soup
(1) Soak the kombu seaweed for 15-30mins. Cut slits along the sides
(2) Place the kombu seaweed in the pot of water and turn the heat on. When water starts boiling. Turn off the heat and remove the kombu.
(3) Throw in the bonito flakes (katsuobushi) and boil for 3 mins. Remove the bonito flakes.
Note: I used dashi soup bags to keep the bonito flakes, this is for easy removal. You can sieve the soup to remove the bonito flakes if you do not have such dashi soup bags.
(4) Pour in soy sauce, sake and mirin and bring the soup to boil. The dashi soup is now ready.


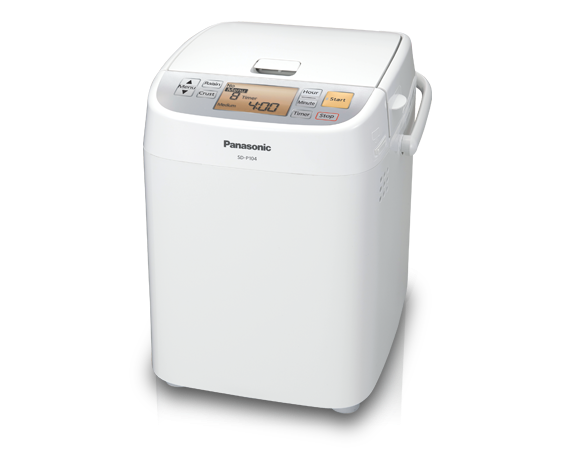
The breadmaker is available for sale at:
Best Denki Ngee Ann, Junction 8, Katong, Court Mega Store, Harvey Norman, Isetan, CK Tangs and Takashimaya.
The retail price is at $329 and above store mentions are subject to stock availability.
The retail price is at $329 and above store mentions are subject to stock availability.
Panasonic Singapore
Official WebsiteOfficial Facebook Page
Please support my blog! Click on the link and vote for me (Little Miss Bento) at Panasonic's FB page. Thank you so much!ブログのランキングに参加中。よろしければクリックしてくださいね♪ ありがとうございます。
↓ ↓ ↓ ↓ ↓ ↓ ↓ ↓ ↓
Singapore Blog Awards 2014 voting link here - daily votes are allowed. (Voting period is from 7 July to 31 July 2014). Follow my food art and bento creations on my Facebook my page here or my Instagram here. :)